In this article, you will begin your project after the sheetrock is finished.
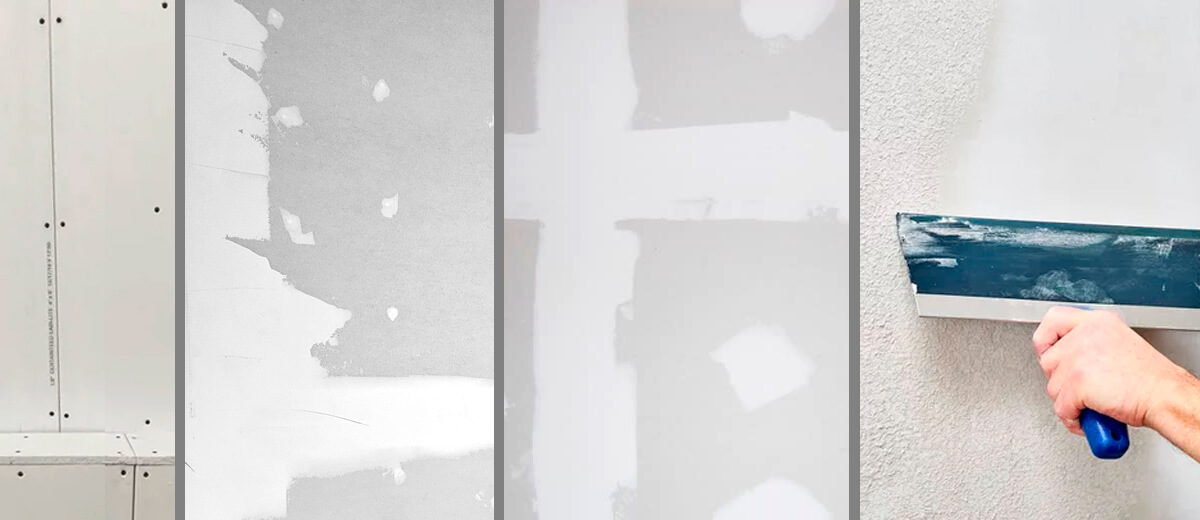
Although you are not doing the drywall, it is important that you know how to identify the level of drywall finishing you are painting, so you can prep and prepare accordingly.
After the skim coats have dried, the entire surface will be gently sanded once more – to smooth out and remove all tool marks and blemishes. Once this process is over, the drywall is ready for the priming and painting service.
Watch These Videos:
Levels of Drywall Finish: Lamont Brothers/You Tube Channel
Home Depot: How to Prime a Wall
Dun-Edwards: Tips on Painting
Chances are you are painting Level 1-4 Finish on your drywall which is where we will begin.
If you are painting over a level 5, you will need to apply a sealer for porous surfaces, before you prime
and paint.
Be sure to discuss which sealer is best with your paint dealer or professional.
Many think that painting drywall is an easy task – just roll on a couple of coats of paint – but on the contrary. Because drywall is a porous material, it easily absorbs paint. Drywall compound and drywall tape are also two different materials which absorb paint differently – resulting in an uneven finish if not prepared properly.
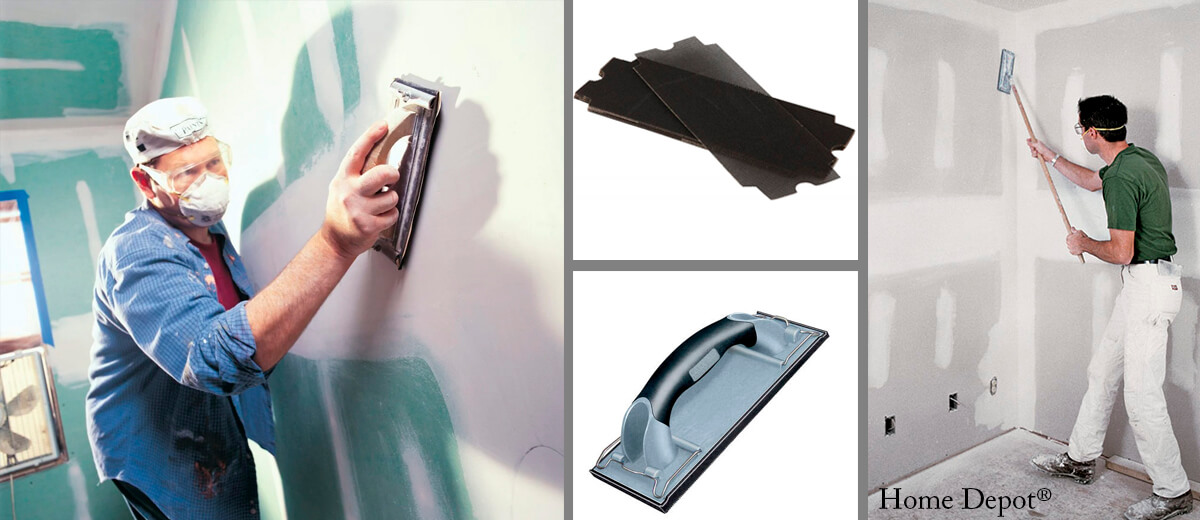
Hand-check to make sure your drywall finishing is smooth and ready for primer.
Be sure all joints, screw holes, and taping has been fine-sanded smooth and ready for primer. If you need to sand further, be sure to use a standard sanding block as shown, with at least 180 grit sanding screens to smooth the wall.
ALWAYS wear a mask! Sheetrock dust is extremely fine and can cause serious symptoms of inhaled.
The Right Paint:
Using the proper paint will give your drywall a nice even, smooth, and uniform finish, while using the wrong kind of paint can make your finish look patchy, uneven, and visually unappealing.
The Visual Finish/Look of Paint: Using different paint for different areas of your house
Flat – is commonly used for ceilings
Satin – used for living, dining, bedrooms, etc., with little wear and tear.
Semi-Gloss – for bath, kitchen, laundry room, and high usage areas with more moisture and other elements where walls need to be wiped down more often.
Watch This Video:
The Right Primer for NEW Drywall: True Value: Which Primer to Use
Latex primers are good for drywall because they even out the surface of the wallboard and any joint compound applied to it, and any areas that have been patched or repaired. They also can cover and seal in previous minor stains from smoke, lipstick, crayon, etc., but are not as effective at covering stains as oil- and shellac-based primers.
These primers are water-soluble and so are easy to clean. They also come in low- or no-VOC formulas, making them a healthier alternative to oil-based and shellac primers.
Primer for Levels 0-4 Drywall: What is a PVA Primer?
PVA is an Interior latex Primer & Sealer and is designed for use on interior drywall and masonry providing good uniformity for any appropriate latex or oil topcoat.
PVA primer is only designed for priming bare drywall under flat or matte paints. The polyvinyl acetate formula evens the porosity of joint compound and the drywall’s paper face so that subsequent coats of primer or topcoat cover evenly.
Primer for Level 5 Drywall with Skim Coat: What is the best sealer to use?
Level 5 requires a specialty primer, which is best discussed with your paint professional.
Be sure to discuss which primer is best with your paint dealer or professional.
Some talk about oil-based, but this is not recommended for new drywall. Typically, oil-based primer is mostly used for covering up existing finishes like wallpaper or covering stains. Oil-based primers raise the grain of the drywall and make the finish look uneven.
Watch These Videos:
True Value: Which Primer to Use
At this stage: Your new drywall has been taped, sanded, smoothed, and is ready for primer.
Watch This Video! Prepare and Paint Your NEW Drywall – The Excellent Laborer
– Start by dusting or wiping the drywall with a damp (NOT SOAKED) large sponge or cloth to remove any dust or debris and allow it to dry.
– Roll and brush primer according to instructions on the label and allow proper drying time.
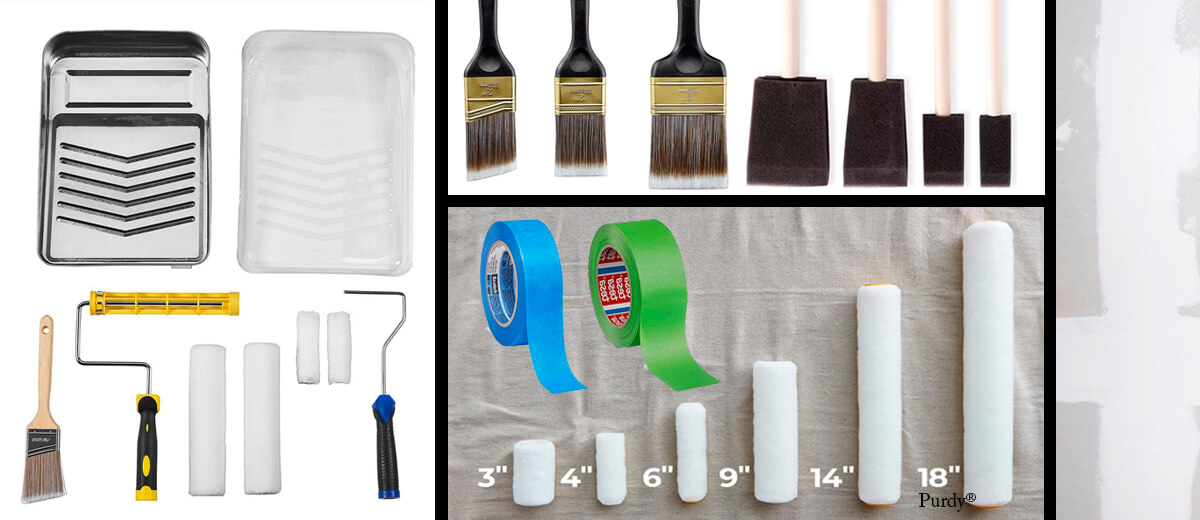
Use The Proper Brush and Roller
Brushes:
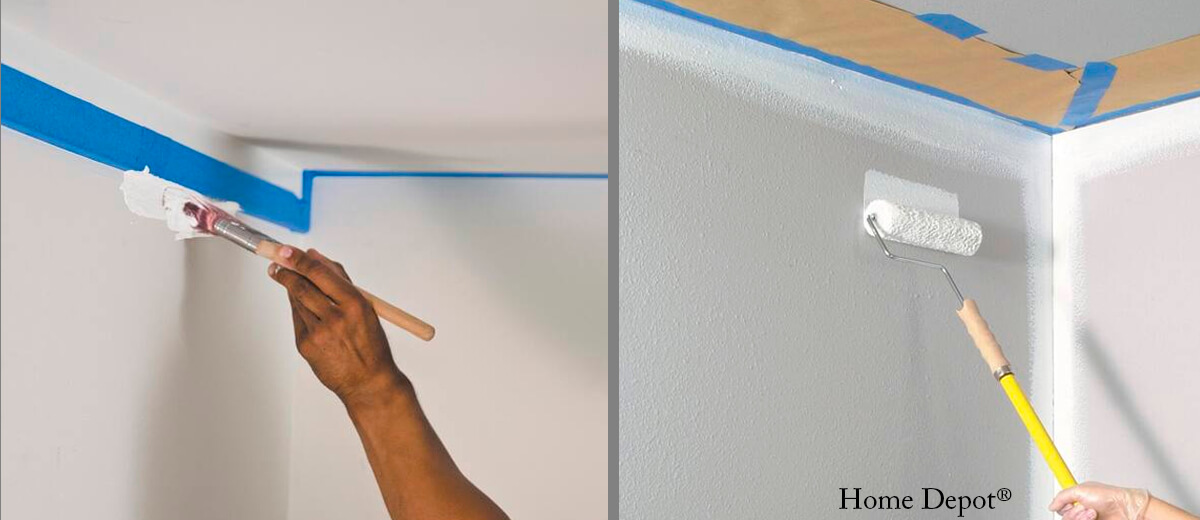
2-3” tapered edge for “Cutting In” corners, windows, doors, and fixtures: Using a good quality synthetic hair or foam brush prevents broken bristles, or hairs from coming off the brush and being applied to wall while painting.
Paint out about 3 inches from corners and around fixtures first. This prevents rollers from getting so close to corners that they leave roller marks on the opposite side of the corner.
Rollers: 12-18” with extension pole
Use a shorter nap or foam roller to ensure a smooth first and second coat. DO NOT overload your roller. Two thin coats are best.
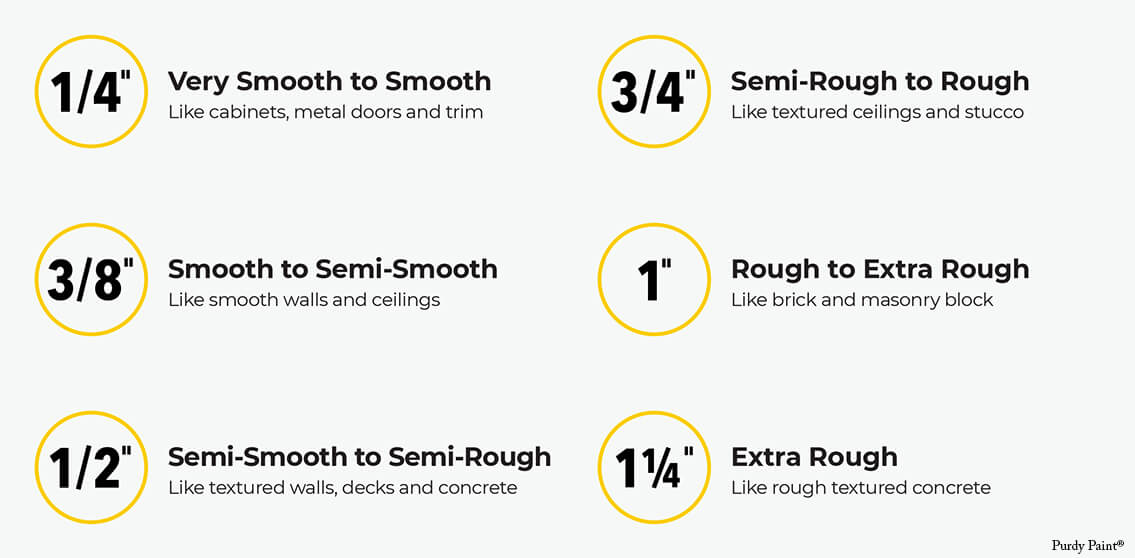
Choosing the right Roller for the job
Watch These Videos:
Purdy Painting Tools: How to Choose a Paint Roller
Purdy Painting Tools: How to Use A Paint Roller
Use even brush and roller in application: Keeping a “Wet Edge”
Even overlapping strokes & Rolls are essential when applying paint to a surface. The strokes will ensure the even distribution of paint, resulting in a smooth, consistent finish. When using uneven strokes, it’s easy to end up with an uneven paint job that looks patchy and sloppy.
Let the primer dry completely between the first and second coats.
It’s essential to let the first coat of paint dry completely before applying a second coat. If you don’t, the second coat will not adhere properly and may end up peeling or flaking off. Allowing the first coat to dry also enables you to assess whether you need a second coat – sometimes, one coat is enough to achieve the desired effect.
– After the primer dries, lightly sand away bumps and ridges using very fine grit sandpaper (180) on the sanding pad and extension pole handle or sheet folded into quarters.
– When the grit of one section of sandpaper becomes covered with dust, switch to an unused section and continue.
– Dust the wall clean dry towel, or a damp towel or sponge and allow it to dry before painting.
Painting Drywall
Apply paint following the same cutting-in and rolling techniques as primer application.
Watch These Videos:
Purdy Painting Tools: How to Choose a Paint Roller
Purdy Painting Tools: How to Use A Paint Roller
Watch These Videos:
The Excellent Laborer! Prepare and Paint Your NEW Drywall
Home Depot: Best Paint Rollers For Your Project
Home Depot: How to Paint a Room / Painting Tips
Glidden Paint: How To Use a Paint Roller And Videos
With brush: Cut-in the corners and around windows, doors and fixtures.
Apply paint with your selected roller size.
Roller Nap/Thickness: – For Drywall – Usually the Medium 3/8 roller covers best
When Finished – Clean-up – Pat yourself on the back for a Job Well Done.
However, if you don’t have enough time, you may want to consider hiring a professional. These professionals will have the experience and expertise to finish the job quickly and efficiently.
Topics we will discuss with you before you hire us.
Please visit our Certification pages:
– Google Page for our long list of 5 Star Ratings.
– El Gato Painting Services From our website here
– Reviews for the company Customer testimonials from our website here
This will give you the peace of mind that you have hired trustworthy and reliable professionals.
Related: How To Paint Your Brick
Contact El Gato Painting Services today and get a free quotation!
Click on Cat to PRINT
The El Gato Difference brochure
Yes, or No? Things to consider beforehand. While painting can transform almost any home interior…
Giving your cabinet exteriors a face-lift. Applying a clear coat of varnish to kitchen cabinets…
Your kitchen cabinets say a lot about the personality of your home and your taste…
How to Repair Stucco Before You Paint. Stucco is a popular exterior finish for homes,…
Welcome Home - Is What Your Front Door Says The threshold to your home and…
Termites are one of the pests that are hard to eliminate. And most of the…
This website uses cookies.