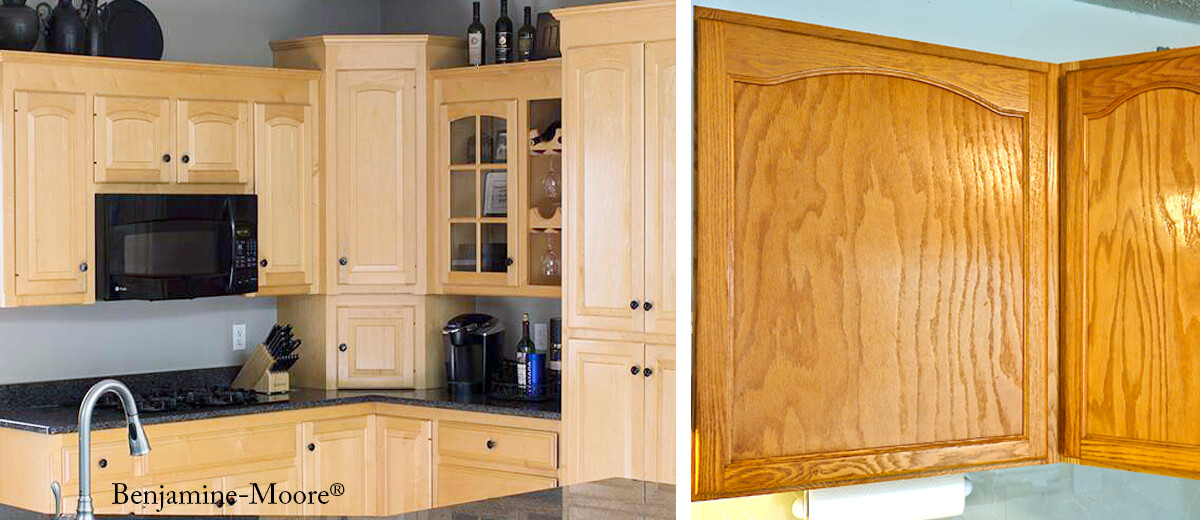
Giving your cabinet exteriors a face-lift.
Applying a clear coat of varnish to kitchen cabinets is a great way to protect and enhance their appearance. Your kitchen cabinets say a lot about the personality of your home and your taste in design.
Just a reminder though: Clear Coating is NOT Refinishing. It is simply applying a clear beautification coat of varnish over the existing finish, with minimal repair or alterations.
Clear Coating is a great option if:
- You still like the style of your cabinets and want to keep them, rather than replace them.
- The finish on your cabinets is still in relatively good shape with only fading and minimal cracking, peeling or blemishes.
- A good idea when painting and repairing your house is to list it for sale.
Although this may seem overwhelming at first, it’s not as labor-intensive as it seems.
Materials and tools you may need:
– Paint Tray – Paint brushes – 220 / 320 grit sandpaper – Varnish – 2” – 3” brushes – Drop cloths – Clean lint-free rags – 5-in-1 scraping tool – Mineral spirits or denatured alcohol – Step stool – Combination tip screwdriver – 4” Paint roller – Saw horses & tabletop – Rubber sanding block – Painters tape / blue or green for easy removal – Handheld shop vacuum
A typical Re-coat will consist of two or three coats of clear.
Steps of Preparation:
Follow these steps of preparation and varnish application to ensure satisfaction
of a job well done.
Two ways to deal with Doors and Hardware:
1. Tape around hardware and leave doors hanging:
You could use blue or green painter’s tape and tape around handles and hinges. This may save you time, but it can also be a bit clumsy when brushing the varnish coat around the shape and location of the hardware.
Unintended Drips & runs are also more prone to happen when applying varnish around the fixtures.
2. Removing handles, hardware, and doors – Play it safe
By removing these, you give yourself much better application control when applying varnish. Smoother and longer brush strokes without having to brush around the fixtures. This is also a perfect time to update your hardware. It’s an easy task, so why not?
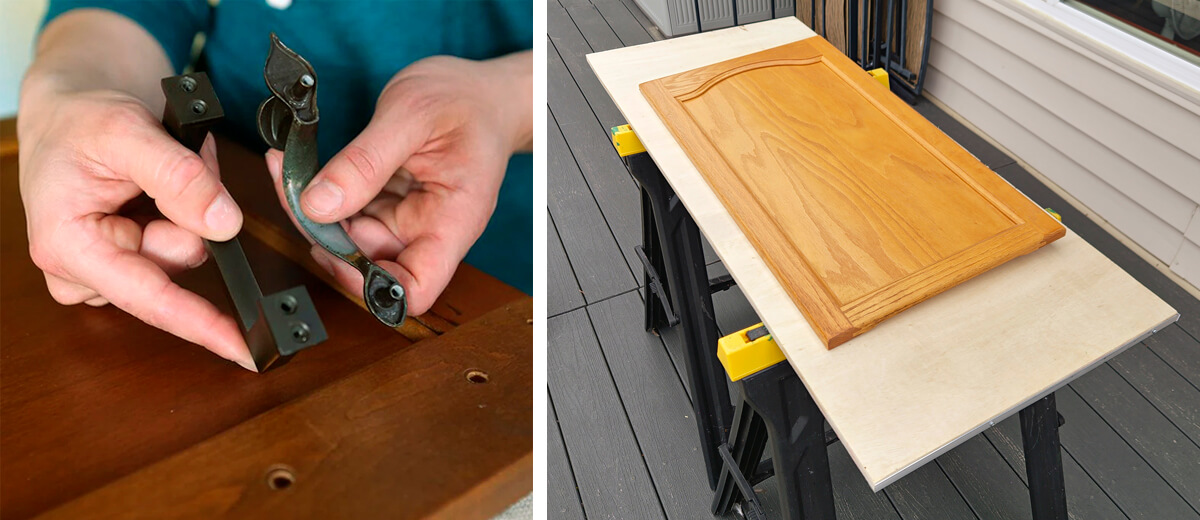
3. Creating a workspace:
For this step you will want to set up a tabletop on a couple of sawhorses or adapt (commandeer) the dining or kitchen table with protective covering.
Laying your cabinet doors on a flat surface will allow the varnish to flow out better
and dry more smoothly.
4. Easy scuff /sand / prepping the cabinets
Hopefully, your existing cabinets will still have a decent surface, “worn and tarnished” but good enough that you will succeed with little or no huffing and puffing.

5. Before you sand – remove stickers and any gummy residue:
Remove any sticky residue from stickers or other adhesive products that have been collecting on the cabinets for years.
Clean with a degreaser, such as TSP (Tri sodium phosphate), or other reputable adhesive-removing brand, and then use clean water to rinse thoroughly.
6. Apply spot stain sparingly:
Only stain the bare spots, where the varnish has worn off and exposes the raw wood.
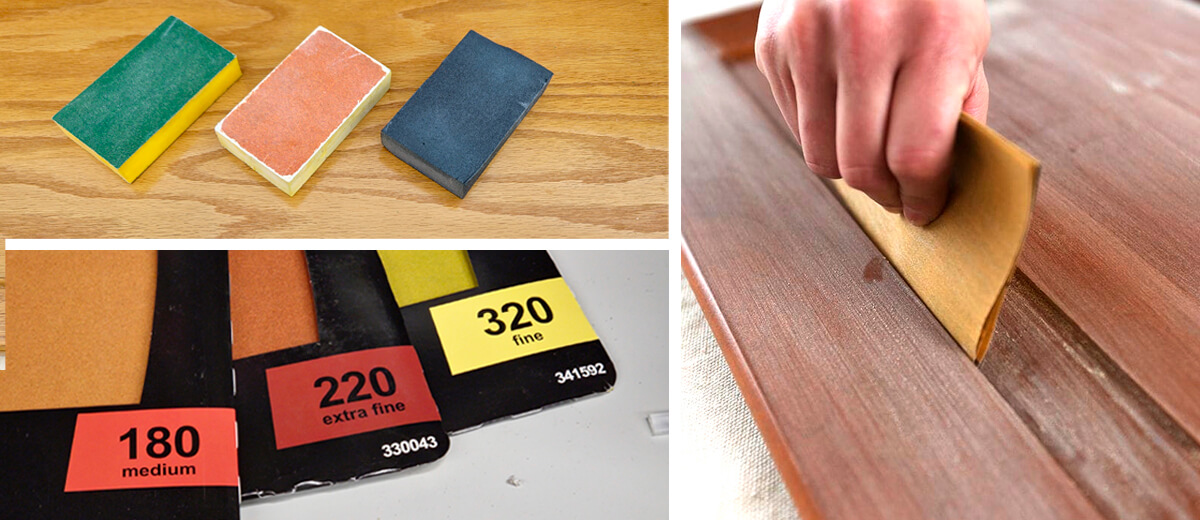
7. Sanding outside surfaces:
Use fine-grit sandpaper – 220-320 – grit to lightly sand the surface of the cabinets. This will create a smooth surface for the varnish to adhere to and remove any existing imperfections in the finish. You’ll find several different sanding methods out there. Which one you use is entirely up to your experience level.
8. Scratches: Matching the varnish and stain:
Your stained and varnished surface is probably many years old. Colors fade, so your original stain color may be hard to find and match.
You may want to take a small drawer front, or door into the hardware store to hold against the color chart and wood samples – to get the closest match.
Your hardware or paint store professional should have the knowledge to assist you best.
9. Apply spot stain sparingly:
Only stain the bare spots, where varnish has worn off and exposes the raw wood.
Popular methods used by the pros:
- Small rag on your fingertip
- Stain stick – which works like a magic marker
- Cotton swab
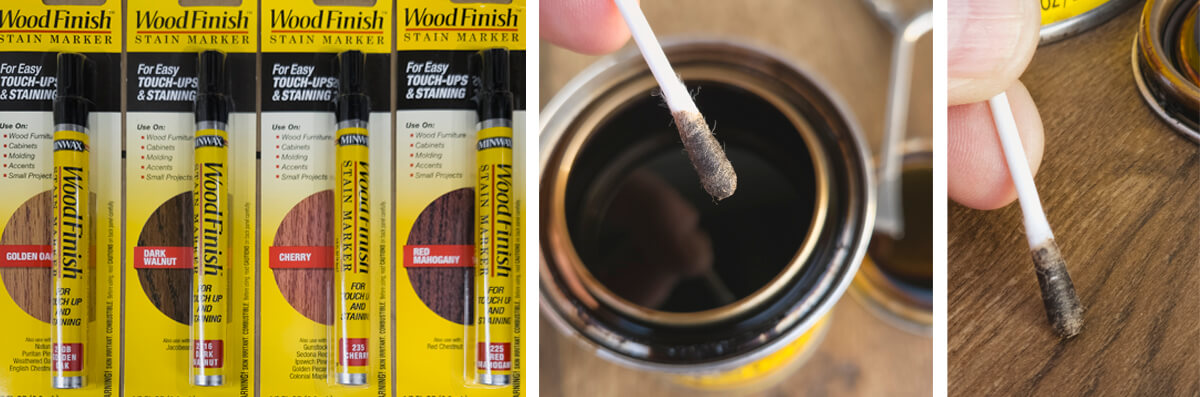
Be sure to wipe off any excess that may get on the existing varnish, so the two colors do not build up on each other.
Talk to your dealer or read the instructions on stain container for proper drying time.
After stain dries – Sand again with sanding block with 220-320 grit sandpaper.
Find great links below…
 10. Sand outside of cabinets and doors.
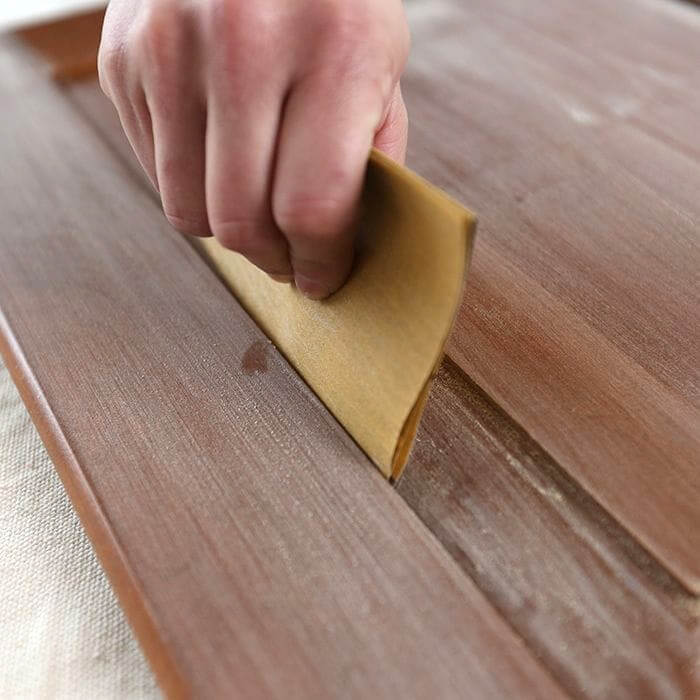
Then wipe off the sanding dust. If there are any architectural details or molding on doors, you’ll want to fold sandpaper in some cases to get into the fine corners or rounded moldings.
Feel how smooth your surface is now. If not smooth enough, then go over it one more time with the 320 grit. That should give you the smoothness you are looking for.
Select your type of top coating or finish:
FYI: Most factory custom-built cabinets are oil or lacquer-finished.
You’ll find what you need at:
- Major Home Improvement Centers
- Marine Chandlery. Marine coatings are especially made for boat brightwork on boats and are formulated for constant exposure to sun and weather.
Partial listing of coating brands for your research:
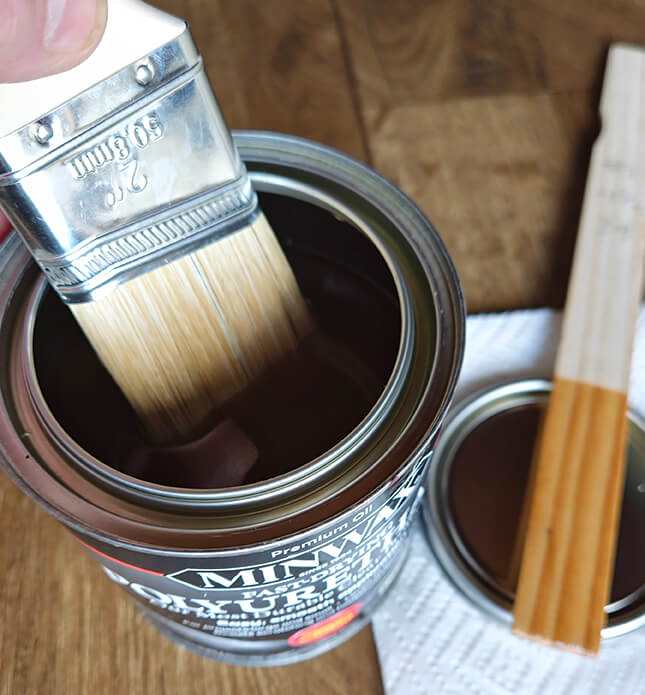
Minwax Helmsman, Minwax Polycrylic, Varathane Polyurethane, Minwax Polyurethane, ManO’ War Spar Varnish, Interlux Brightside Polyurethane, Rust-Oleum Marind Spar Varnish, Behr Water-Based, Watco Lacquer
Remember: It is always best to consult with your local paint dealer, or professional when selecting your varnish options. And always check the paint label on the can for specific instructions.
What is your original coating? The 10 Year Ruling.
Age matters here if you are unsure what your cabinets are coated with.
- Most agree that if your cabinets are older than 10 years – you can just clean well, sand and apply whatever topcoat you prefer. At this age – oil, or water-base will work
- If less than 10 years, then sand and apply a base coat of clear shellac before you apply
your finish coat, to avoid any compatibility problems. - Shellac acts like a primer – like you use for painted surfaces.
High-gloss or Satin?
- Semi-Gloss finish is a popular choice among homeowners and interior designers alike due to its higher levels of resin content, which gives them greater durability compared with satin options.
- High gloss finish will give your cabinets a high glossy sheen, but it may show a lot of dings or mistakes.
What’s the difference? Water-based or Oil-based?
- Water-based (polyacrylic) coatings tend to dry faster and have less odor while drying, however, you may need to apply more coats to achieve your desired finish.
- Oil-based (polyurethane) coatings may last longer and offer a more durable finish.
Varnish or Polyurethane?
- Polyurethane – Oil or water-based: is a plastic-like topcoat that applies clear and offers ultimate durability against dirt and damage.
- Varnish – Oil or water-based: is similar but adds a glossier film that gives it additional protection against high-moisture areas.
Links & Tips
Lowe’s: How to Refinish Wood Furniture
Welcome to the Woods – The difference between water or oil based coatings
Ron Hazelton – Refinish kitchen cabinets without stripping
Home Depot – How to apply polyurethane to wood
Applying your 2-3 coats:
Woah!!! Use caution here: Good ventilation may be needed.
Tip: Always work in a well-ventilated area of the house or work outside in fresh air.
Tip: Wear a mask when in doubt.
Water-based coatings may cause less discomfort and airway irritation than oil and solvent-based coatings.
Stir the coating thoroughly before use to ensure it’s well-mixed.
Use the proper 2 – 3” high-quality brush to apply the coating evenly onto the cabinets.
What kind of brush or roller? Synthetic, Foam, or Natural bristles?
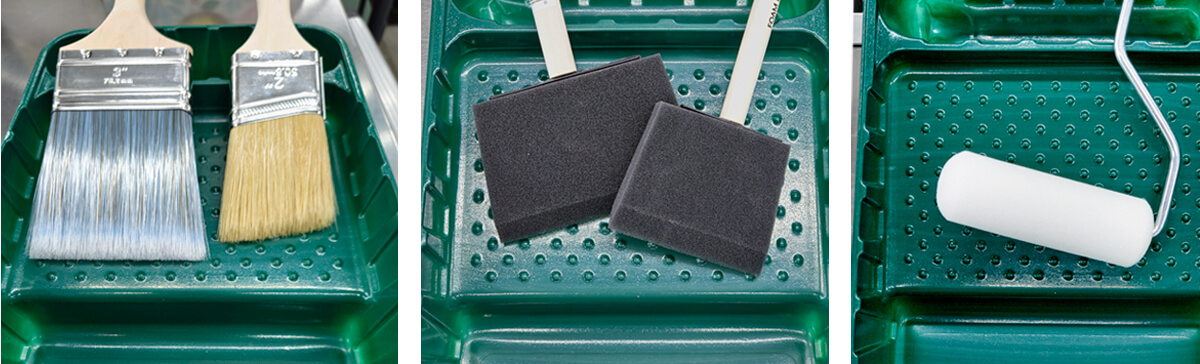
Brushes:
– Synthetic bristle brushes are best for Water-based varnishes.
– Natural bristle brushes work best for oil-based coatings.
– Caution: Not a good idea to use solvents on synthetic bristle brushes.
Rollers:
– Many favor the foam roller because it does not absorb too much varnish and applies a thin even coat.
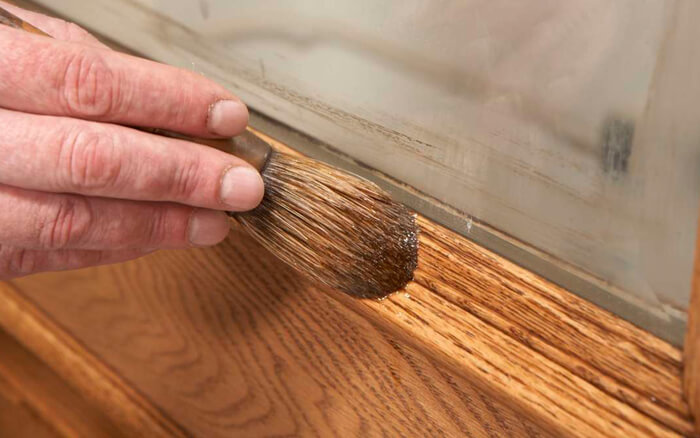 Work in smooth, even strokes and rolls, following the direction of the wood grain. Start at the top of the cabinet and work your way down to prevent drips and runs. Apply a thin, even coat of varnish.
 Avoid overloading the brush with varnish. You only need to cover about 1/3 of the brush with varnish. Any more can lead to excessive build-up which can cause drips and uneven application.
Allow the first coat to dry according to the manufacturer’s instructions. This typically takes several hours, depending on the type of varnish and environmental conditions.
Sand between coats: Once the first coat is dry, lightly sand the surface with fine-grit (220-320) sandpaper to smooth out any imperfections or raised grain. Wipe away any dust with a tack cloth or damp cloth.
Repeat this if needed between coats.
Apply additional coats of varnish following the same process as the first coat. Depending on the desired level of sheen and protection, you may need to apply two or three coats in total, allowing each coat to dry thoroughly between applications.
Once completely dry. Remove any tape from the hardware.
If doors were removed: Put doors back on.
You may want to purchase some 1/4” round adhesive-backed felt dots to place in the corners of the doors, to dampen and subdue the noise of the door slamming into the cabinet frame.
Reattach Hardware: Once the final coat of varnish is completely dry, reattach the hardware to the cabinets using a screwdriver.
Cure Time: Allow the varnish to cure fully before using the cabinets. This typically takes several days to a week, depending on the type of varnish and environmental conditions.
Avoid placing heavy objects or cleaning the cabinets until the varnish has fully cured. By following these steps, you can achieve a beautiful, durable finish on your kitchen cabinets with a clear coat of varnish.
Clean-up – Dispose properly
Whether oil-based or water-based coatings are used, they can both harm the environment if disposed of improperly. If poured down a storm drain or sewer system, they have the potential to pollute our groundwater, rivers, and streams.
Brief summary of each step:
- Preparation: Remove the hardware, clean the cabinets thoroughly, and let them dry completely.
- Sand the Cabinets: Use fine-grit sandpaper to create a smooth surface and remove imperfections, then wipe away dust.
- Choose the Varnish/Coating: Select a clear that is suitable for wood surfaces, either oil-based or water-based.
- Apply the Varnish/Coating: Stir well and apply evenly with a brush, and work in thin, even coats. Start from the top and work down to prevent drips.
Using synthetic bristle brushes for water-base varnishes and acrylics.
Using natural bristles for oil-based (the solvents can damage some synthetic bristles). - Sand and Apply Additional Coats: Once dry, lightly sand between coats and apply additional coats as needed for the desired sheen and protection.
- Reattach Hardware: After the final coat is dry, reattach the hardware using a screwdriver.
- Cure Time: Allow the varnish to fully cure before using the cabinets, which typically takes several days to a week.
!!! Pat yourself on the back for a job well done.
Conclusion:
El Gato Painting has the knowledge, track record, and reputation to do your project right. The first time.
Topics we will discuss with you before you hire us.
- We’ll furnish you our complete list of satisfied customers.
- Verify we are licensed and insured.
- Agree with you in writing on price and responsibilities.
- Be sure you get our best warranty for the work.
- Make sure we use high-quality materials and paints.
- We’ll carefully go over our 21 steps of preparation and application.
- Welcome your questions and concerns.
- Look forward to your final inspection of our crew’s excellent work.
Please visit our Certification pages:
– Google Page for our long list of 5 Star Ratings.
– El Gato Painting Services From our website here
– Reviews for the company Customer testimonials from our website here
This will give you the peace of mind that you have hired trustworthy and reliable professionals.
Contact El Gato Painting Services today and get a free quotation!

Click on Cat to PRINT
The El Gato Difference brochure


Comments are closed.