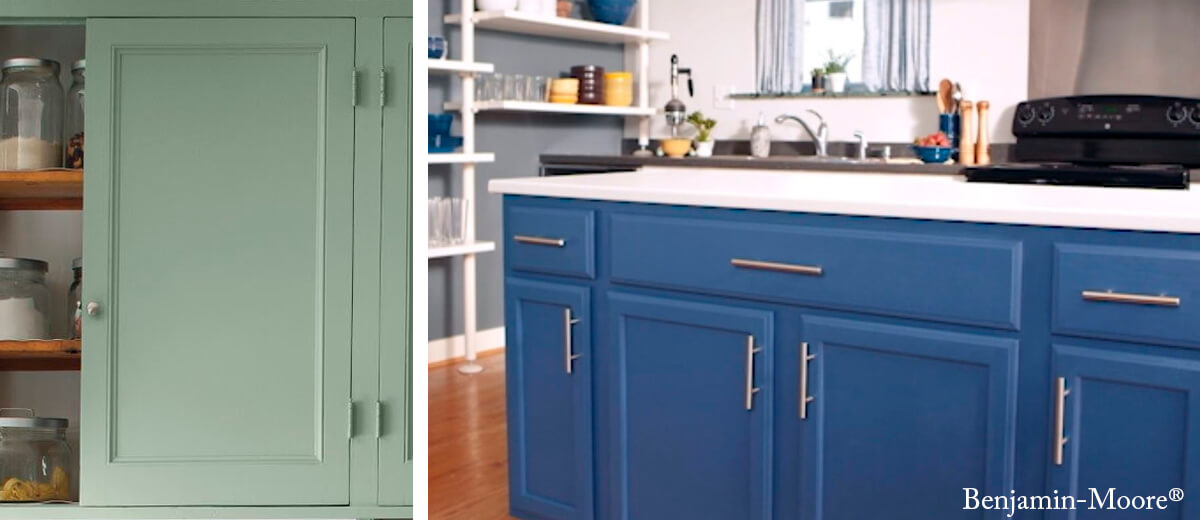
Your kitchen cabinets say a lot about the personality of your home and your taste in good design.
Yet, over the years, styles change and finishes fade or get old, making them in need upgrading replacements or reconditioning.
In this article we will assume you’ve made the decision not to replace your cabinets for thousands of dollars, but to save money and paint your kitchen cabinets yourself.
Although this may seem overwhelming at first, it’s actually not as labor intensive as it seems.
Yet if you want a good job, you will need to follow the necessary steps of preparation and application of paint.
Which approach is best for you? What is your level of perfection?
There are several approaches to re-painting your kitchen cabinets.
We’re leaving out the quick and dirty choice, where you just roll paint over everything, including hardware and hinges not caring about the look.
This is how many apartment owners do it when they’re in a hurry to recondition, apartments for new tenants and are on a budget.
Not a very good look and not the cabinets you want to look at everyday if you’re living in the same house.
Let’s address a couple standard approaches that may fit your needs a bit better.
 Easy Scuff / Sand, Prime and paint
Hopefully, your existing cabinets will still have a decent surface “worn and tarnished” but good enough where you you will succeed with little or no huffing and puffing.
 Removing Old Chipped & Peeled Before You Paint.
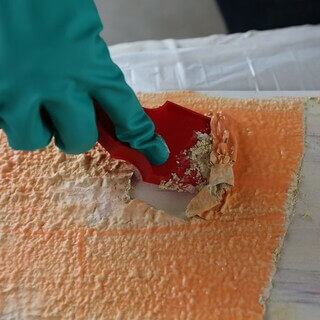
If your cabinets are not in decent condition as mentioned above, the old paint will need to be removed.
- Stripping products are available that make this process easy.
- Simply apply with a brush, wait for the stripper to react with the old paint,
- then use a plastic scraper to scrape and peel it away.
- Once dry, remove the last of the paint with sandpaper.
- Remove remaining paint remover residue with clean water and
lint-free rag.
What Surface Are You Painting?
Wood, wood-laminate and metal cabinets usually can be repainted without difficulty.
Plastic laminate cabinets might not accept a topcoat of paint — those that can be refinished often require special paints and techniques, and results can vary.
Purchase the appropriate supplies: Solid wood, laminate or metal.
- Check the paint label on the can for specific instructions.
- Wood cabinets are ideal for painting, but any surface that can be
scuffed with sandpaper can be painted. - Laminate cabinets require a special bonding primer. The laminate must be in good condition for best results.
- A gloss finish will make your cabinets sheen, but it may show a lot of dings or mistakes.
- Semi-gloss or satin finishes are typically used for kitchens. Some flat-finish paints can be difficult to clean. Check the instructions for details.
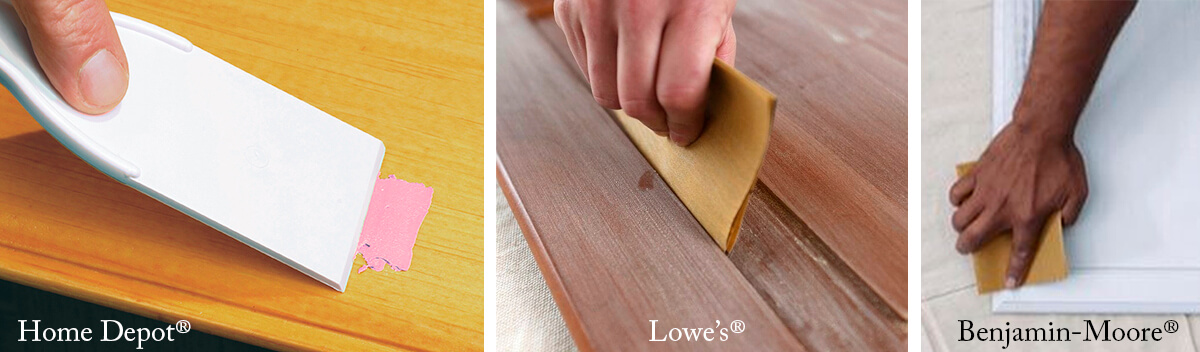
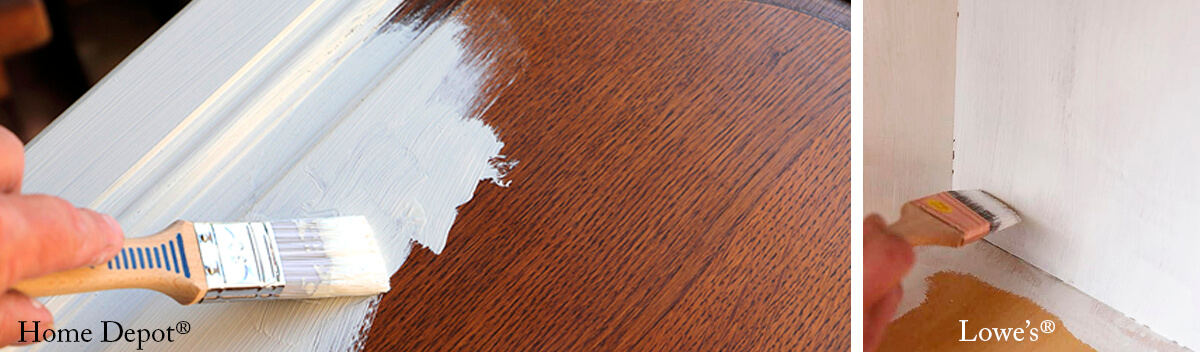
Links & Tips
Lowe’s: Video: How to paint kitchen cabinets
Refinish & clean kitchen cabinets
Benjamin-Moore: How to paint kitchen cabinets
Home Depot: How to paint kitchen cabinets
Materials and tools you may need:
– Paint Tray – Paint brushes – 220 / 320 grit sand paper – Primer
– Paint – 2″ or 3” brushes – Drop cloths – Clean lint-free rags
– 5-in-1 scraping tool – Mineral spirits or denatured alcohol – Step stool
– Small area lights to see inside cabinets – Combination tip screwdriver
– 4” Paint roller – Saw horses & table top – Rubber sanding block
– Painters tape / blue or green for easy removal – Handheld shop vacuum
A typical re-paint will consist of one or two options:
- Two coats of paint if painting over Acrylic or Latex base.
- Primer, then 2 coats of paint when applying over oil or lacquer.
Most factory or custom-built cabinets are oil or lacquer-finished.
Steps for Preparation:
Hardware:
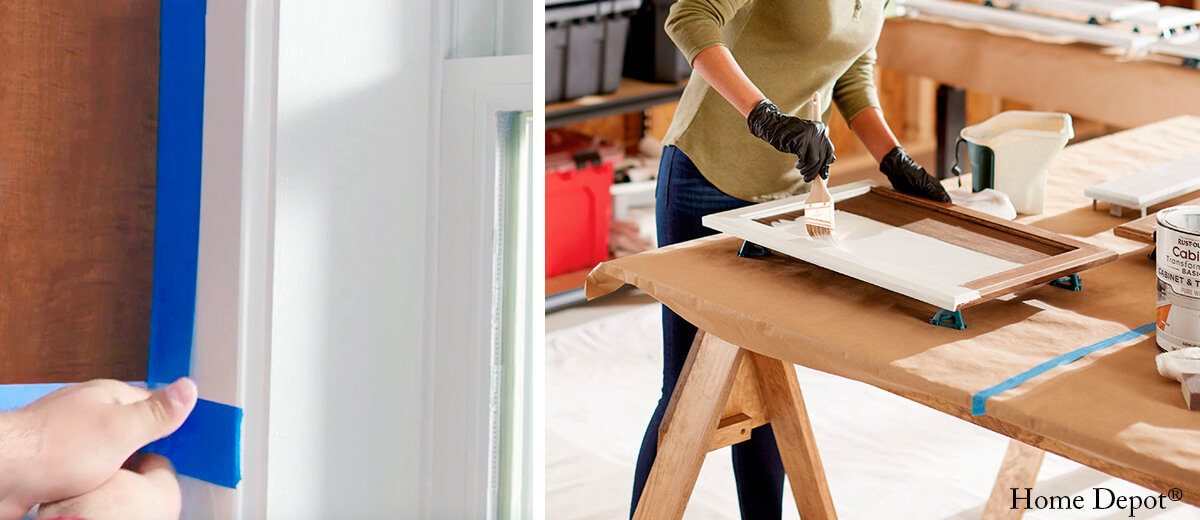
Using blue or green painter’s tape, tape around hardware, OR remove it.
Doors: Create a “Painting Area”
Take off doors. Prep and paint on the table, or leave on to prep in place.
Inside cabinets
Remove any clips, shelf paper, or pads. If shelves are removable, set them on table for prep and sanding.
Gummy residue:
Remove any sticky residue from shelving paper etc. Clean with a degreaser, such as TSP (Tri sodium phosphate), or other reputable brand and then use a clean water to rinse thoroughly.
Fill and patch any dips and dings with appropriate filler
Then sand smooth and prepare to sand the rest of the cabinets
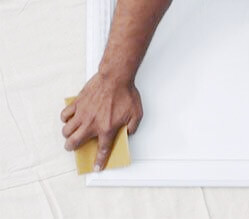
Sanding inside and outside the cabinets and doors:
Sand inside, sanding block with 220 grit sandpaper – important to get close
to corners. Then vacuum out sanding dust.
Behr Link to sanding cabinets
Sand outside of cabinets and doors same as inside. Then wipe off sanding dust. If there are any architectural details or molding on doors, you’ll want to fold sandpaper in some cases to get into the fine corners or rounded moldings.
Feel how smooth your surface is now. If not smooth enough, then go over it
one more time with the 320 grit. That should give you the smoothness you
are looking for.
Clean your surfaces well before you prime and paint:
Wipe down with mineral spirits or denatured alcohol. This cleans the
surface and leaves very little residue which allows the paint to stick better.
Primer coat:
Primer is applied to an existing surface when you need the top coat of paint to adhere properly.
It is always best to consult with your local paint dealer, or professional when selecting your priming options.
A primer coat is necessary when applying water-based paint over oil-based, or lacquer paint.
If prepped and sanded correctly, then applying primer over water-based paint is not required.
If you are unsure what the surface coat is, then a primer is a good option, with the appropriate primer. Such as: Zinsser BIN primer, Zinsser Cover Stain primer or Benjamin-Moore STYX. Again, consult with your paint dealer for best results.
If you are not happy with the smoothness of the primer coat, you can always finish sand once more with 220 grit and smooth it out.
Once the primer is dry. Wipe down once more with alcohol-based cleaning solution just before you apply your first coat of paint.
Which direction to brush?
If cabinets are made of wood, then paint in the direction of the wood grain. This is typically up and down top to bottom.
Not real wood? Still, paint up and down from top to bottom for the best look.
HOLD ON A MINUTE! Look before you leap here.
Here is what you need to know about different kinds of paint.
Will you use Water based or Oil base paint?
Water based paint is Acrylic, or Latex
You cannot apply this water based paint over oil based painted surface. It will not stick without first applying a primer coat.
Oil based paint is sometimes refereed to an alkyd paint.
You can apply this oil based paint over acrylic or latex and of course oil painted surfaces. It will stick well with or without a primer coat, but still better with primer.
Applying your two (2) coats of paint:

Apply your first coat using your 2” or 3” brush.
Again: Paint up and down top to bottom.
Wait to dry thoroughly.
Look over the surface. If smooth enough, then apply your second coat.
If it has collected lint or dust from the room, you can finish sand with 320 grit, then wipe down with lint-free rag and apply second coat.
Once dry – Completely dry.
Remove any tape from hardware.
If doors were removed: Put doors back on, remove tape from hardware
and /or reattach hardware.
Conclusion:
El Gato Painting has the knowledge, track record and reputation to do your project right. The first time.
Topics we will discuss with you before you hire us.
- We’ll furnish you our complete list of satisfied customers.
- Verify we are licensed and insured.
- Agree with you in writing on price and responsibilities.
- Be sure you get our best warranty for the work.
- Make sure we use high-quality materials and paints.
- We’ll carefully go over our 21 steps of preparation and application.
- Welcome your questions and concerns.
- Look forward to your final inspection of our crew’s excellent work.
Please visit our Certification pages:
– Google Page for our long list of 5 Star Ratings.
– El Gato Painting Services From our website here
– Reviews for the company Customer testimonials from our website here
This will give you the peace of mind that you have hired trustworthy and reliable professionals.
Contact El Gato Painting Services today and get a free quotation!

Click on Cat to PRINT
The El Gato Difference brochure


Comments are closed.