
Have you noticed blisters or paint bubbling on your walls? Paint blistering and bubbling is a common problem that many homeowners face. In most cases, the bubbling paint is only on the surface of the paint and doesn’t pose any real danger to your home. Yet, you may want to address the problem as soon as possible to prevent further damage.
Let’s discuss the causes of paint bubbling, so we can offer some solutions for how to fix it!
What causes paint to blister and bubble?
- Trapped Moisture Under the Paint
Trapped Moisture under the paint layer is one of the most common reasons for paint to blister or bubble. Moisture can get trapped during the painting process if there is high humidity, improper surface preparation, or the surface is not allowed to dry before the paint is applied.
Once moisture is trapped, it will try to escape by pushing against the paint layer and causing it to bubble or blister. In extreme cases, the paint may even peel off entirely. - Leaks from roof or plumbing fixtures
Damaged drywall from leaky plumbing fixtures or roof leaks are very common causes for paint to blister and bubble as well. This can also be rather expensive, due to the cost of a plumber and/or roofer as well. It is a good idea to periodically check around your plumbing fixtures for drips that can lead to wall damage.
Be sure to fix the leaky plumbing or roof first, or the problem will reoccur more quickly than you think.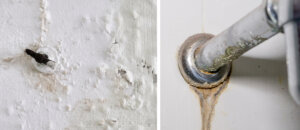
- Poor Quality Paint
Poor-quality paint often contains fillers and low-grade resins, resulting in a lack of adhesion. It can lead to bubbling because the paint cannot adhere properly and form a solid layer. - Excessive Heat
Excessive heat can cause paint to blister and bubble. Hot weather conditions can cause the thinners mixed with fresh paint to vaporize and expand outwards, leading to blistering. Using a roller or brush improperly can also introduce air bubbles. - Using Paint on Incompatible Surfaces
Using paint on incompatible surfaces can cause bubbles because the surface may not allow proper adhesion. Common incompatible surfaces include:- New construction drywall that has not been dusted and cleaned.
– Surfaces that have not been cleaned thoroughly.
– Walls against a bed with no headboard, which have not been cleaned properly.
– Door jambs that have not been cleaned and prepared well. Paint bubbling and blistering can also occur when a water-based latex paint is applied over an oil/alkyd type paint without priming. This happens when the paint film does not bond properly with the surface and may cause bubbles. These bubbles can range in size and can even lead to peeling or flaking of the paint.Priming is always required before painting an alkyd/oil surface with latex paint.
- Improper Thinning or Dilution of Paint
When painting, it is essential to use the appropriate thickness or dilution of paint. Thinning and diluting the paint too much can result in bubbles. This happens because the added liquid weakens the binding agents in the paint, causing air bubbles to form and become trapped under the paint’s surface as it dries. Thinning too much can also result in poor coverage and an uneven finish. It is important to follow the manufacturer’s recommendations for thinning and dilution before use.

How to repair air bubbles on painted walls.
- Remove the damaged paint.
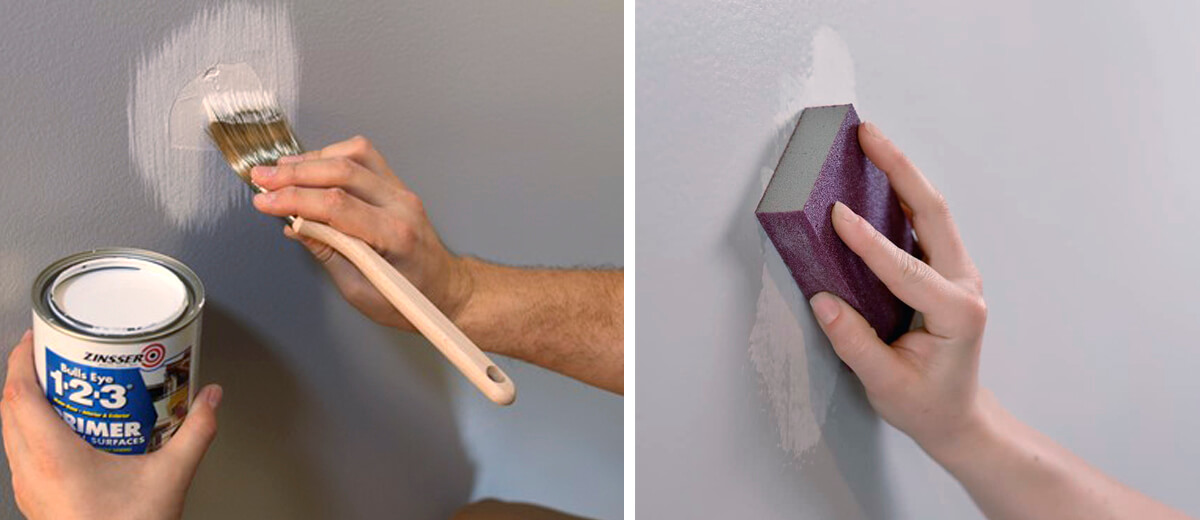
Using a sharp putty knife, carefully scrape away the bubbled paint. - Prepare the Surface
After removing the damaged paint, sand the area and clean it with a damp cloth. - Prime the Surface
Apply a high-quality primer to ensure the paint adheres properly to the surface. In high visibility areas, you might use a thin layer of spackle to build up the low areas where the bubbles were removed. Sand and prime again before painting. - Repaint the affected area.
Once the primer has dried, apply a thin layer of paint, and allow it to dry completely before adding any additional coats. For the best result, you may want to paint the entire wall, corner-to-corner, because it is hard to match existing paint that has been there for some time.
How to prevent paint bubbles.
- Prepare the Surface Properly
One of the most common causes of paint bubbles is moisture trapped beneath the paint layer. To prevent this, prepare the surface by making necessary repairs and cleaning well before painting. Also, be sure one coat is dry before adding additional coats. - Use the right kind of paint.
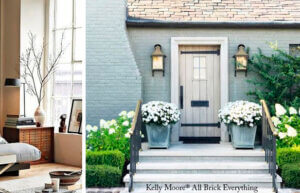
Avoid using low-quality or cheap paint, as this can result in bubbling. Using high-quality paint and a roller with a thick nap will help ensure an even application of the paint. Some of your better nationally known brands include Kelly-Moore, Sherwin-Williams, Benjamin Moore, PPG, Behr, Valspar, and Rust-Oleum, and don’t forget to ask your local paint supplier for more. - Use multiple thin coats – Instead of one thick coat.
Applying a thick coat of paint can trap air underneath the paint which can cause bubbling. Using multiple thin coats is best. It may take more time to complete your project using multiple thin coats, but it can result in a smoother finish and prevent unsightly bubbling. - Allow proper drying time.
Be sure coats are completely dry before adding another. Remember, if the previous layer is not fully dry before adding another coat, the added moisture can cause air pockets to form and create a bubbled effect on the surface. - Remember to follow the instructions as indicated on the product label.
A smooth finish is always the primary goal. If you do not feel confident with painting your walls, contact El Gato Painting Services.
El Gato Painting has the knowledge, track record, and reputation to do your project right. The first time.
Topics we will discuss with you before you hire us.
- We’ll furnish you with our complete list of satisfied customers.
- Verify we are licensed and insured.
- Agree with you in writing on price and responsibilities.
- Be sure you get our best warranty for the work.
- Make sure we use high-quality materials and paints.
- We’ll carefully go over our 21 steps of preparation and application.
- Welcome your questions and concerns.
- Look forward to your final inspection of our crew’s excellent work.
Please visit our Certification pages:
– Google Page for our long list of 5 Star Ratings.
– El Gato Painting Services From our website here
– Reviews for the company Customer testimonials from our website here
This will give you the peace of mind that you have hired trustworthy and reliable professionals.
Contact El Gato Painting Services today and get a free quotation!
Scan or Click on Cat QR to PRINT
The El Gato Difference brochure


Comments are closed.